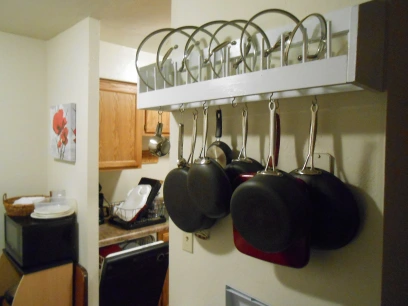
DIY Project: Pot Rack with Lid Storage

***Today we have a guest post on Young Wife Chronicles (written by my fabulous sister Kimberly!), and she is going to teach us how to do an incredible DIY project for cookware storage! 🙂 I hope we will see many more posts from her in the future!***- Glorianna


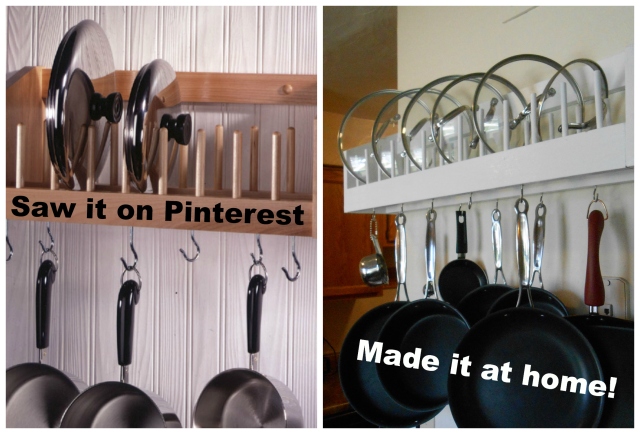
Most cookware storage ideas I’ve seen on Pinterest take up valuable cabinet and drawer space in your kitchen, and some even require drilling holes into things that renters aren’t allowed to drill holes in.

So, what if you rent, and you don’t have a whole cabinet to devote to your cookware set?

This wall-mounted pot & lid rack fit my requirements, except it wasn’t quite big enough to fit all my cookware. If you need a custom storage solution for your kitchen, this project isn’t too difficult to make, provided you have the right tools. I’ve never done any kind of woodworking, but with a few basic instructions on how to use the saw, I was able to complete this project in a couple of afternoons. If you can convince someone to take your kid(s) for a day, it can be done a lot quicker than that. 🙂

PicMonkey Collage

Conveniently for me, my dad lives 2 miles away, and his shop is filled with any kind of tool I could ever need. If you don’t have these tools, you probably know someone who does. I would recommend bartering. You give them cookies; they let you use their power tools. Almost no one will say ‘no’ to cookies.

You can customize the materials depending on the look you want, and how much money you have to spend. Use the finest cedar wood and overlay it with gold (not practical, since gold is so heavy), or get free scraps of lumber from Craigslist and let your kid color it with crayons (totally avant-garde). I took the middle of the road, and bought some inexpensive lumber from Lowe’s and used leftover paint from another project. I’m pretty happy with the way it turned out. It’s far from perfect, but it will suit my needs just fine. Since I know I did a bunch of things wrong with this project, this tutorial is more to show you how, by trial-and-error, I completed the project. If you want to know how to do it right, you need advice from someone actually knows what they’re doing! If you are an experienced carpenter or handyman, feel free to laugh at me. 😀

Materials:

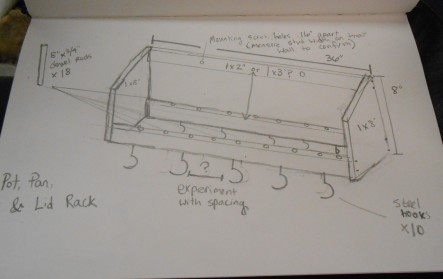
  • 2- 1×3″ boards, 6′ long
  • 1- 1×8″ board, 6′ long
  • 10- screw-in cup hooks (like this)
  • 3-  3/8″ dowels, 48″ long
  • screws (I used deck screws that my dad already had. Not sure if they were 2 1/2″ or 3″)
  • paint (leftovers from another project)
  • wood glue
  • wood filler (not needed unless you make extra holes & need to fill them in… Oops!)
  • screw covers or end caps (optional)
 
You will have some leftover wood, but that’s good if you are a n00b like me. You might want some scraps to experiment with, so you don’t ruin your project.

Tools:

  • Circular saw
  • Smaller saw for cutting the dowels
  • Tape measure
  • Quick square
  • Pencil
  • Power screwdriver/drill
  • Screwdriver bit
  • Small drill bit (for predrilling screw holes)
  • 3/8″ Wood drill bit
  • Sandpaper

CAUTION: PLEASE PLEASE PLEASE BE CAREFUL. I googled “circular saw” to get a picture of the saw I used, & I ended up seeing some disturbing pictures of the damage power tools can do to a hand. *shudder* Keep appendages clear of the blades!

Here’s what I did:

1. Sketch out a rough idea of what you want. Make a list & gather all the materials you will need.  For me, it was helpful to wander around the store a little bit, looking for what I needed, so I could see what was available, and how different sizes of boards, dowels, and hooks looked. If you know exactly what you need, online ordering saves a lot of time. Lowe’s & Home Depot both have the option to order online & pick up at your local store.

DSCN1934

2.Measure, and cut your wood.

DSCN1941

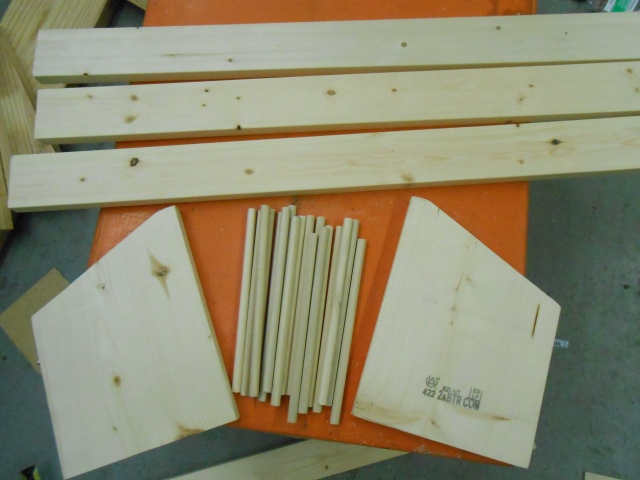
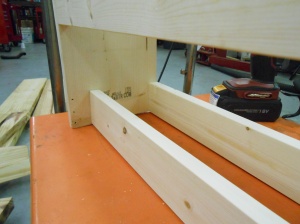
For the front piece, and the two back pieces, I measured & cut the 1x3s into three 34″ lengths. Well, they were supposed to all be the same length. I had to cut two of them again, and then sand them down to get them even. Apparently, I don’t know how to operate a tape measure & pencil!DSCN1939
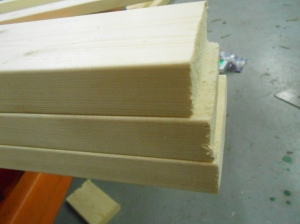
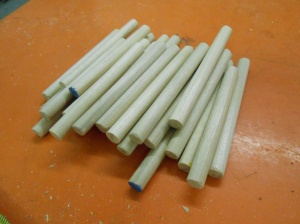
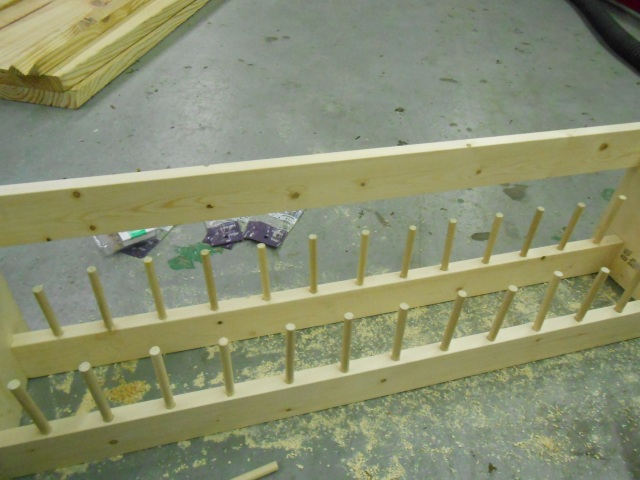
I originally cut the dowel rods to 8″ lengths, but that was way too long & I ended up cutting them down to 4″


DSCN1956

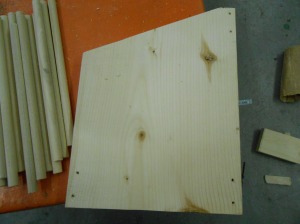
Use the 1×8” board for the two side pieces. 10″ tall on the tall side, 7″ on the shorter side.

DSCN1943

3. Sand the cut edges so it’s all nice and purty.

4. Screw the two 1×8 pieces & the three 1×3 pieces together, BUT WAIT! You need to pre-drill the screw holes on the 1×8 pieces, or your wood might split, like this…
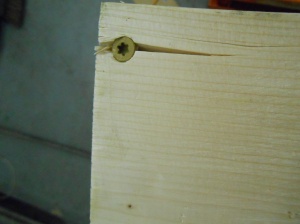
DSCN1942

…and then you might cry (don’t worry, that was extra wood)
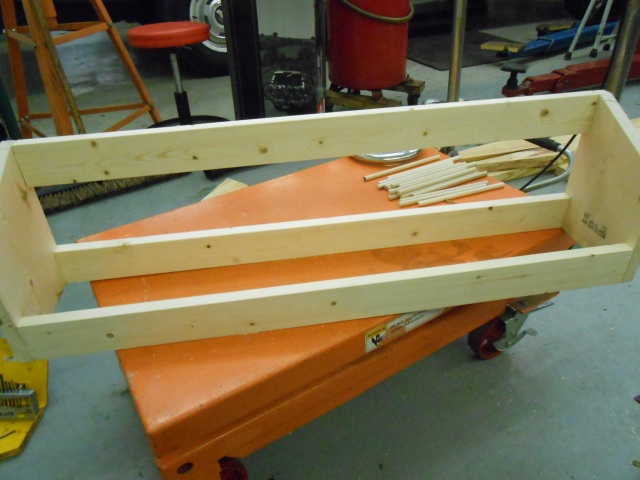
DSCN1946

I realized after assembling it, that I needed to move the bottom wall board in from the edge 2″ so the dowel rods would fit. Duh…

DSCN1947


5. Drill out holes for your dowel rods, using a 3/8″ wood drill bit (same size as the dowels). I spaced the holes 2″ in from each side, then 2 1/4″ apart. DSCN1950The dowels, and the holes in which they go, all ended up being different lengths and depths (because I’m so good at measuring), so I just mixed and matched them until they all were about the same height (so unprofessional). If you really want them exactly the same height, you can sand them down with sandpaper (unfortunately, I forgot to do that). Use a little wood glue on the ends of the dowels to secure them in place.
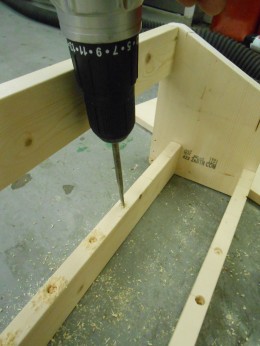
DSCN1957

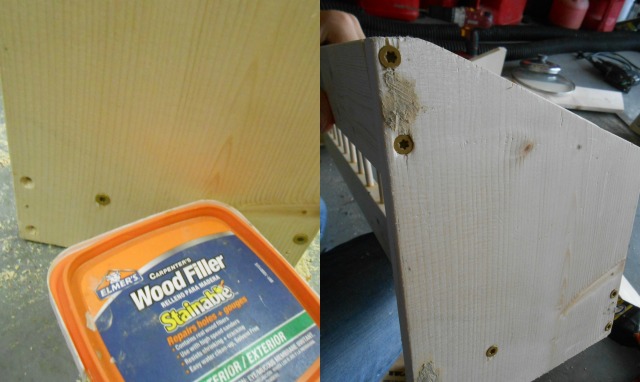
6. Since I drilled a few too many holes, I needed to use some wood filler on the side pieces. Use it like drywall compound: slap it on as smooth as you can, and then, after it dries, sand it until it’s flush with the surface of the wood.

wood filler

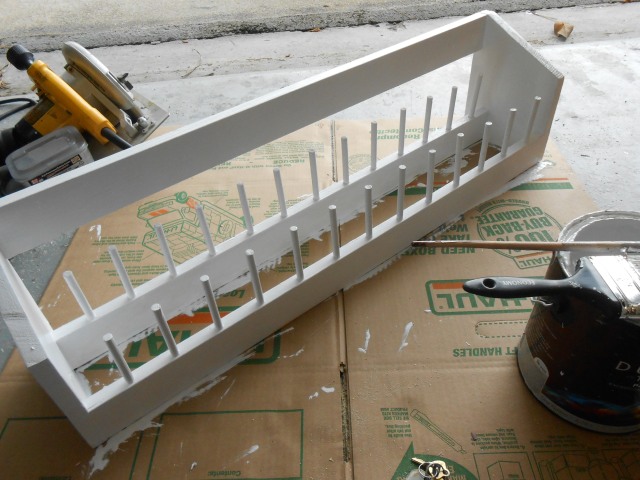
7. Paint it! I used some leftover paint that my dad had from a project he just finished.

DSCN1970

8. Now you need to find the studs in the wall where this will be hanging. Mounting it to the drywall isn’t going to cut it, since this will be supporting a LOT of weight. Don’t tell anyone, but, I just guessed where the studs were, then drilled a couple holes until I found them. So wrong… but it worked! Those extra holes are cover by the pot rack, so it doesn’t matter too much. 😉  Mark the spots on the rack where your screws will go, predrill the holes, then mount it to the wall. Don’t forget your screw caps!
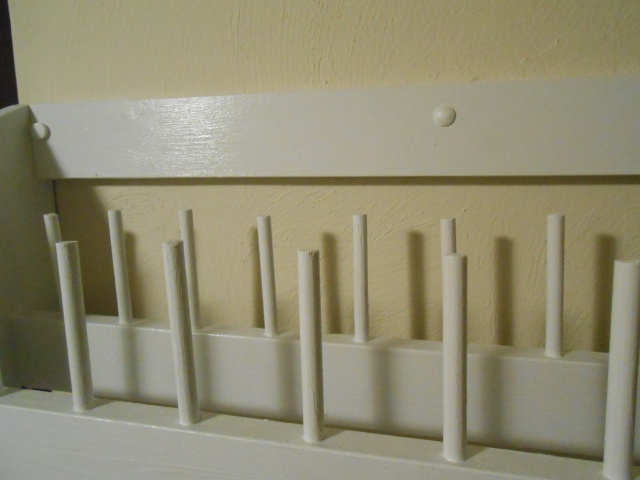
DSCN1974

10. Measure & mark  where your hooks need to go (depending on the size, shape and number of pots & pans you have), then screw ’em in!

11. Put away your cookware & rejoice! You now have cabinet space for your other kitchen junk.

12. Take a picture for facebook, of course. 😉
DSCN1977 DSCN1978


Simplistic Creativity (painting my paper holders)

get-attachment-2.aspx

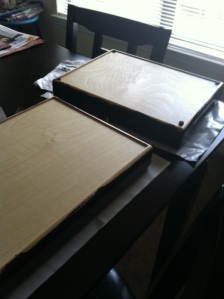
the original color of the paper holders

get-attachment-5.aspx

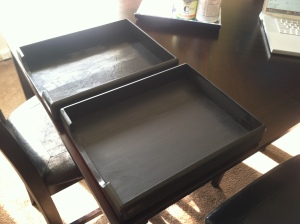
The finished product! Not perfect but they don’t need to be, and I’m happy with the result!

get-attachment-3.aspx

In use in the office!

I’ve been working on painting some wooden paper holders for J.D.’s office. He wanted them black. Since they aren’t going to be around water, this painting job was super easy, and since we got them for free, it was a low pressure kind of project- my favorite kind! If you who are reading this are anything like me, you like to feel creative, do something constructive, and at the same time know that if you mess up or it takes you five months to complete it, you haven’t wasted a bunch of money or taken so much time that the project might as well be thrown in the garbage. 🙂 I like to call this mode of thinking simplistic creativityIt’s where you paint a stool, a knife block, or a paper holder (just some of my endeavors), but there is no pressure in painting these things because they aren’t gifts for anybody, and I don’t have to get them done by a certain time- they are simply for my enjoyment when I have some time where I want to feel like an artist! The end result you ask? Small but colorful things around my house that from time to time I look at and smile, because they turned out exactly how I wanted them to, and I accomplished it by myself. Just call me DIY GIRL! Able to do the simplest projects in a month or two!!  Okay, okay, but really how many of us feel this way?! We spend day after day scrolling through Pinterest finding this recipe or that craft, and they look AMAZING, but will we actually do them? Will we actually get those expensive tools from the craft store, and start a project that requires a degree in art for us to finish?…..For myself, maybe someday. Today, however, I will start with projects I know I can do. I am a list person, so I have found you 7 simple projects from the internet and my brain that you can do to let that inner artist out!

-7 DIY projects for the crafty beginners-

  1. Grab the first wooden thing in your house that is very unlikely to get water on it, and go to town painting it your favorite color(s)!! **MAKE SURE this is not important to you. i.e. your family’s priceless dresser** I just go to my local craft store, find the little bottles of acrylic paint (doesn’t matter what brand, I use the ones that are about 99 cents). When I first started I used horrible paint brushes. Now I use better ones, but trust me I didn’t buy the ones that are twenty dollars and up for one brush 🙂 The one that cost about 5-7 dollars for a whole bunch of different sizes was perfect for me! You’ll be surprised what a little bit of color can do for your perspective on how your decorations look! Get creative 🙂
  2. Grab the boring key that you handle every day, and use some nail polish on that thing!! I haven’t done this yet, but I really need to! If you’re the type of person that has too many keys to keep up with, this is for you! Get those dingy silver keys and paint them! You could even try a pattern too if you’re wanting a little more of a challenge.
  3. Needing some organization, but not loving the prices of some storage bins at Target? I am LOVING the bins at Dollar Tree! They are all different bright colors, sizes, and shapes, and would go perfectly in a laundry room, bathroom, or wherever needs organizing in your home! I know this on its own is not really a DIY project, but here is a link where you can print out some labels. http://www.bhg.com/decorating/storage/organization-basics/free-printable-storage-labels/ –Get creative with some ribbon, take charge of that newly cleaned space and WHAMMO! You’ve added a simple but creative touch to the once plain bins.
  4. Sugar scrubs. This is a typical one but hear me out. I tried this as Christmas presents for a few people last year and I thought it turned out pretty well! I even enjoyed some for myself;). I found two recipes that were super simple, and I’ve found that even with the sugar scrubs long gone, I still have plenty of brown sugar and coconut oil in my cabinet, and let me tell you- neither have been a waste! I like projects that make you buy things you will use up anyway! Here is a link to some that I haven’t tried- They all seem pretty simple, but the one that is similar to what I made is number five on their list! http://www.treehugger.com/organic-beauty/8-homemade-salt-and-sugar-body-scrubs.html — If you find the measurements don’t work for you, I just guessed and added more of one or more ingredients- sugar scrubs are hard to mess up (which is exactly the kind of project I like!!) Put them in some cute little glass jars and you’ve got yourself a present or just a nice relaxer for yourself!
  5. Jewelry. Now before you say “What on earth??? Jewelry is way too hard to make!!”, hear me out. I find that sometimes I lose one earring, and for some reason keep the other one around for years (for no apparent reason), or I’ll have two necklaces and I like certain things about both of them but I wish I could change little things about them. This is where you usually need some tools, so unless you already have some little pliers or you’re willing to buy them, I wouldn’t recommend this. When I did it, I had the benefits of my grandpa’s workshop, which was filled with every kind of jewelry making tool imaginable! So the basics of this project are to find the jewelry you don’t like anymore or don’t completely like, and take the pliers and rearrange them in your own way. It’s pretty simple. Open the wire, take the bead out, close the wire 🙂
  6. No-Sew Pillow cover! This one is something I’ve been wanting to try and here is an amazing tutorial for it- All you need is an old pillow, and some fabric you like! http://organizeyourstuffnow.com/wordpress/the-easiest-pillow-cover-ever
  7. Looking to use up that coconut oil you bought for the sugar scrubs? For those of us who didn’t catch on to the growing mass of people using coconut oil, it turns out it is amazing for all different sorts of uses, and this site I am listing has many uses just waiting for you to try. Just some of them include making your hair smooth, using it as a diaper cream, cooking with it, and many more. **For those of you who aren’t a fan of coconut, the oil does not have a strong smell. You won’t taste it on your food, smell it really in your scrubs** Here are 101 uses for coconut oil!  http://wellnessmama.com/5734/101-uses-for-coconut-oil/

Well, that’s it for this post! Even if you don’t do any of the things listed here, I hope it got your creative juices flowing! Mine sure are…..maybe I’ll go try that key-painting thing tomorrow;) Comment below with some of your favorite quick and easy diy projects! I must warn you though- if they involve sewing, THIS blogger is going to refer them to her momma. I don’t sew worth a lick! Hope you enjoyed this week’s look into what I’ve been up to and helped you realize your true potential to have simplistic creativity!