***Today we have a guest post on Young Wife Chronicles (written by my fabulous sister Kimberly!), and she is going to teach us how to do an incredible DIY project for cookware storage! 🙂 I hope we will see many more posts from her in the future!***- Glorianna
Most cookware storage ideas I’ve seen on Pinterest take up valuable cabinet and drawer space in your kitchen, and some even require drilling holes into things that renters aren’t allowed to drill holes in.
So, what if you rent, and you don’t have a whole cabinet to devote to your cookware set?
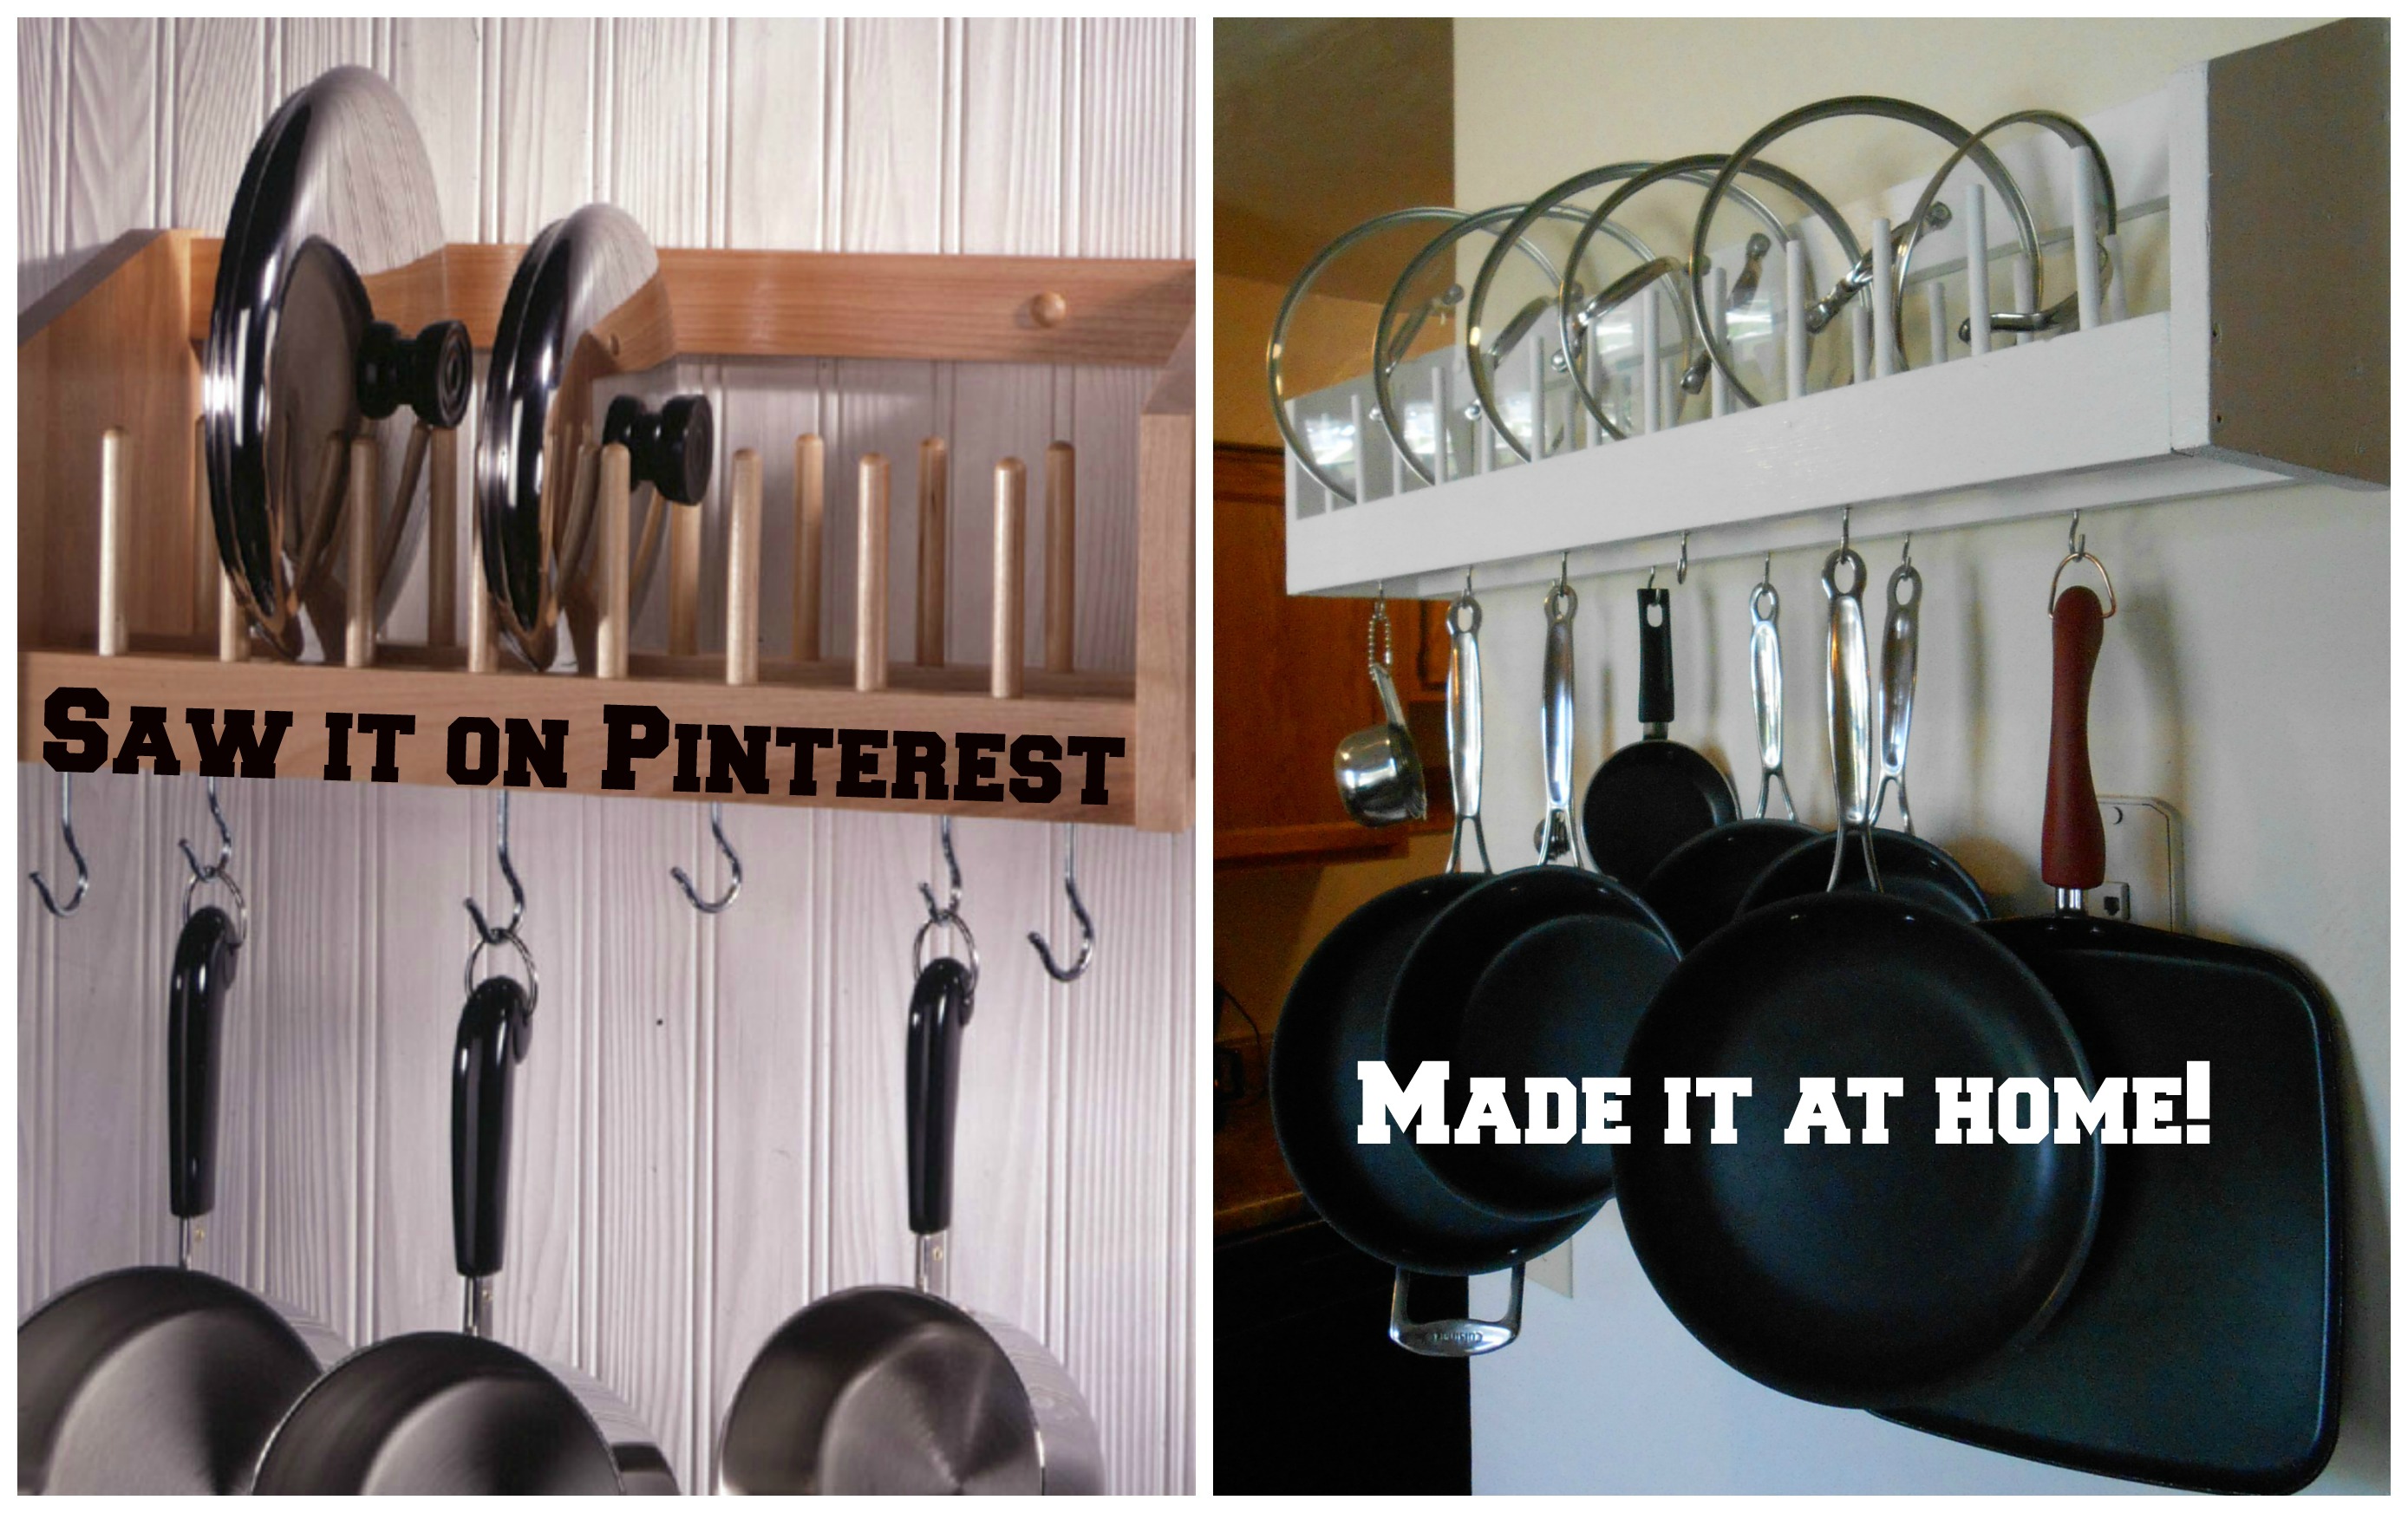
This wall-mounted pot & lid rack fit my requirements, except it wasn’t quite big enough to fit all my cookware. If you need a custom storage solution for your kitchen, this project isn’t too difficult to make, provided you have the right tools. I’ve never done any kind of woodworking, but with a few basic instructions on how to use the saw, I was able to complete this project in a couple of afternoons. If you can convince someone to take your kid(s) for a day, it can be done a lot quicker than that. 🙂

Conveniently for me, my dad lives 2 miles away, and his shop is filled with any kind of tool I could ever need. If you don’t have these tools, you probably know someone who does. I would recommend bartering. You give them cookies; they let you use their power tools. Almost no one will say ‘no’ to cookies.
You can customize the materials depending on the look you want, and how much money you have to spend. Use the finest cedar wood and overlay it with gold (not practical, since gold is so heavy), or get free scraps of lumber from Craigslist and let your kid color it with crayons (totally avant-garde). I took the middle of the road, and bought some inexpensive lumber from Lowe’s and used leftover paint from another project. I’m pretty happy with the way it turned out. It’s far from perfect, but it will suit my needs just fine. Since I know I did a bunch of things wrong with this project, this tutorial is more to show you how, by trial-and-error, I completed the project. If you want to know how to do it right, you need advice from someone actually knows what they’re doing! If you are an experienced carpenter or handyman, feel free to laugh at me. 😀
Materials:
- 2- 1×3″ boards, 6′ long
- 1- 1×8″ board, 6′ long
- 10- screw-in cup hooks (like this)
- 3- 3/8″ dowels, 48″ long
- screws (I used deck screws that my dad already had. Not sure if they were 2 1/2″ or 3″)
- paint (leftovers from another project)
- wood glue
- wood filler (not needed unless you make extra holes & need to fill them in… Oops!)
- screw covers or end caps (optional)
Tools:
- Circular saw
- Smaller saw for cutting the dowels
- Tape measure
- Quick square
- Pencil
- Power screwdriver/drill
- Screwdriver bit
- Small drill bit (for predrilling screw holes)
- 3/8″ Wood drill bit
- Sandpaper
CAUTION: PLEASE PLEASE PLEASE BE CAREFUL. I googled “circular saw” to get a picture of the saw I used, & I ended up seeing some disturbing pictures of the damage power tools can do to a hand. *shudder* Keep appendages clear of the blades!
Here’s what I did:
1. Sketch out a rough idea of what you want. Make a list & gather all the materials you will need. For me, it was helpful to wander around the store a little bit, looking for what I needed, so I could see what was available, and how different sizes of boards, dowels, and hooks looked. If you know exactly what you need, online ordering saves a lot of time. Lowe’s & Home Depot both have the option to order online & pick up at your local store.
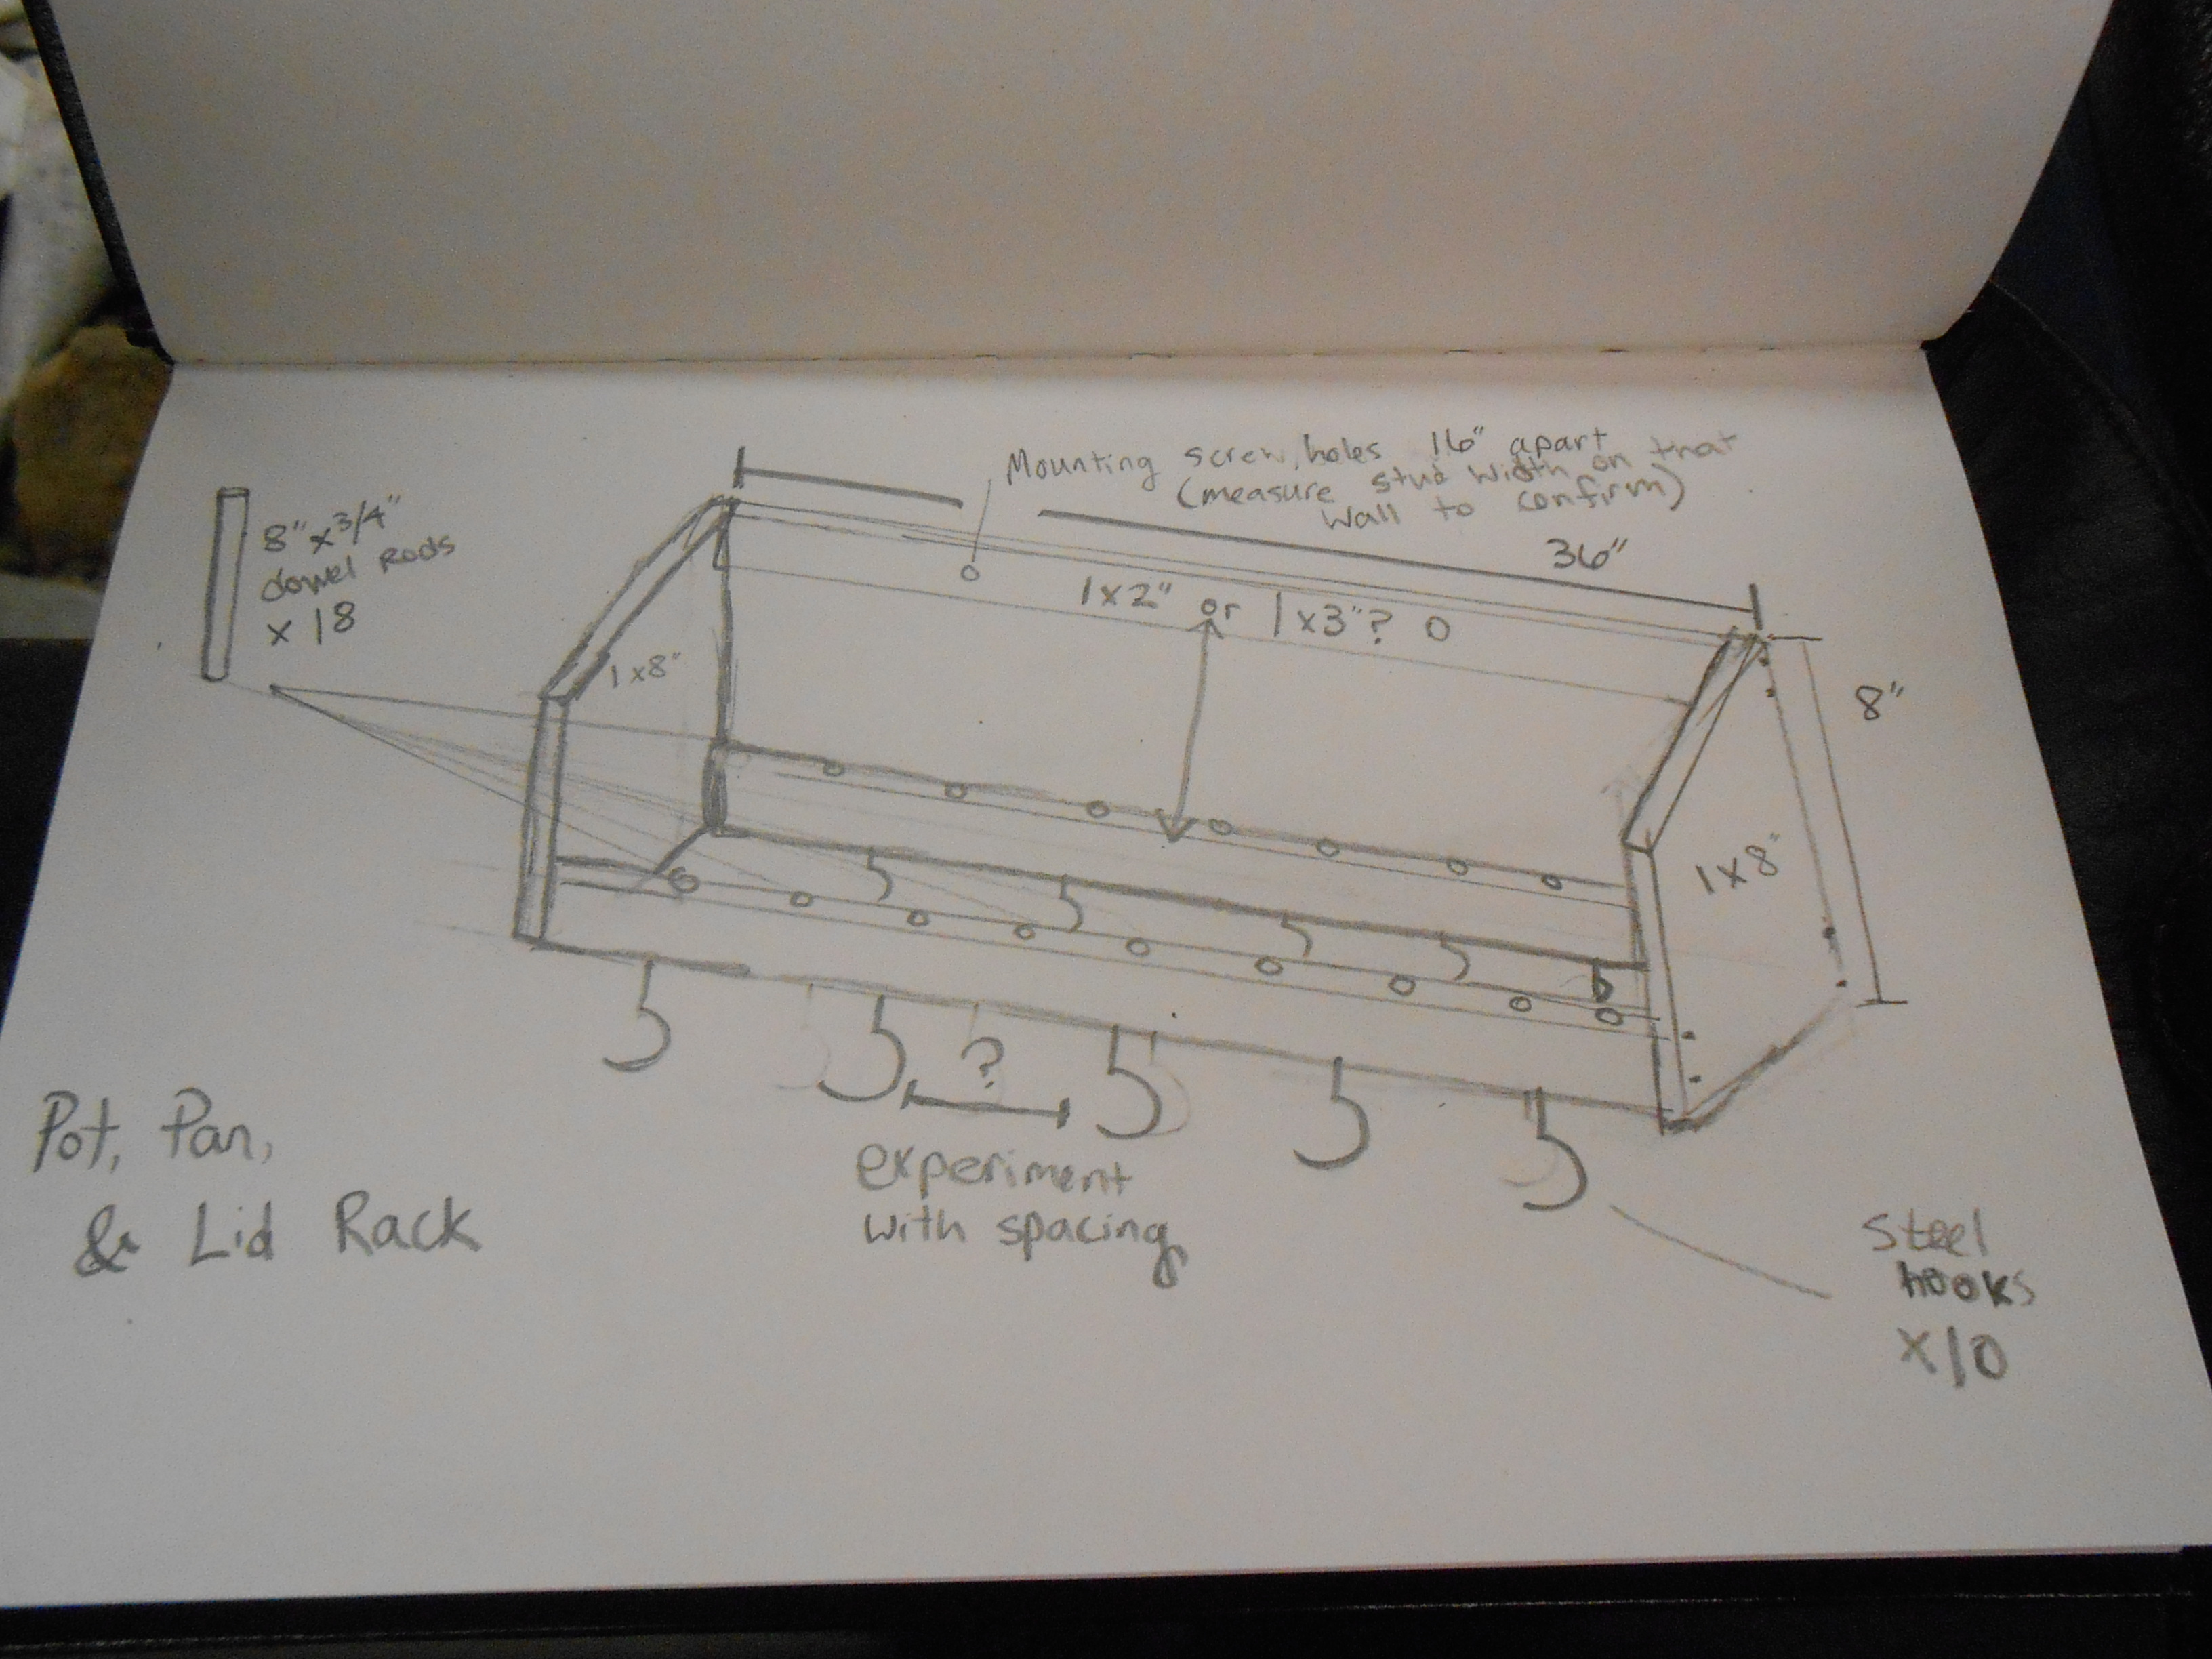
2.Measure, and cut your wood.
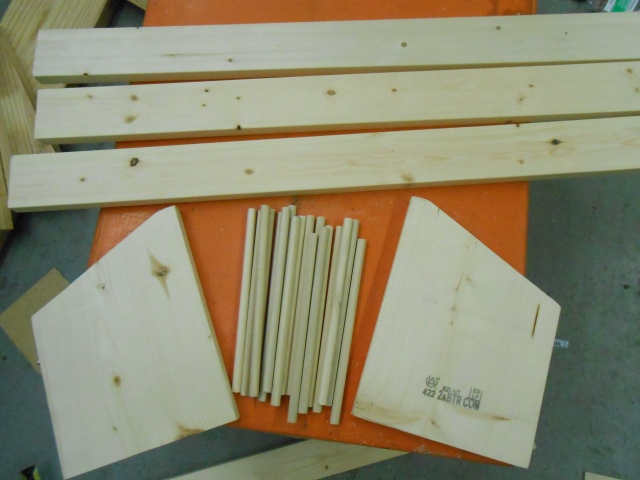
For the front piece, and the two back pieces, I measured & cut the 1x3s into three 34″ lengths. Well, they were supposed to all be the same length. I had to cut two of them again, and then sand them down to get them even. Apparently, I don’t know how to operate a tape measure & pencil!
I originally cut the dowel rods to 8″ lengths, but that was way too long & I ended up cutting them down to 4″

Use the 1×8” board for the two side pieces. 10″ tall on the tall side, 7″ on the shorter side.

3. Sand the cut edges so it’s all nice and purty.
4. Screw the two 1×8 pieces & the three 1×3 pieces together, BUT WAIT! You need to pre-drill the screw holes on the 1×8 pieces, or your wood might split, like this…
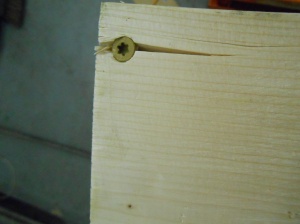
…and then you might cry (don’t worry, that was extra wood)
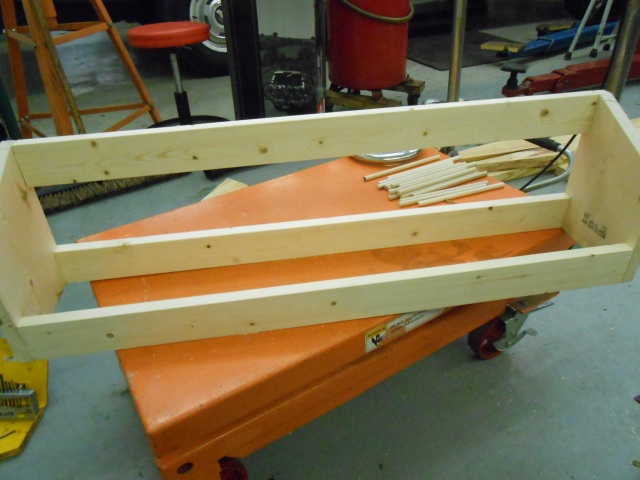
I realized after assembling it, that I needed to move the bottom wall board in from the edge 2″ so the dowel rods would fit. Duh…

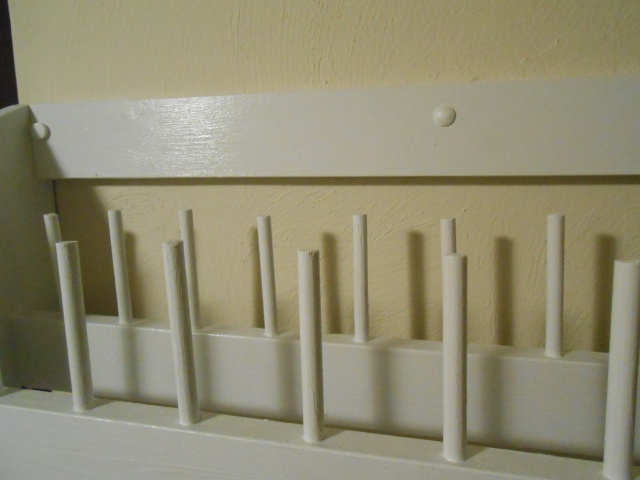
5. Drill out holes for your dowel rods, using a 3/8″ wood drill bit (same size as the dowels). I spaced the holes 2″ in from each side, then 2 1/4″ apart. 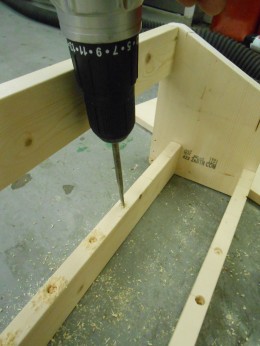 The dowels, and the holes in which they go, all ended up being different lengths and depths (because I’m so good at measuring), so I just mixed and matched them until they all were about the same height (so unprofessional). If you really want them exactly the same height, you can sand them down with sandpaper (unfortunately, I forgot to do that). Use a little wood glue on the ends of the dowels to secure them in place.

6. Since I drilled a few too many holes, I needed to use some wood filler on the side pieces. Use it like drywall compound: slap it on as smooth as you can, and then, after it dries, sand it until it’s flush with the surface of the wood.

7. Paint it! I used some leftover paint that my dad had from a project he just finished.

8. Now you need to find the studs in the wall where this will be hanging. Mounting it to the drywall isn’t going to cut it, since this will be supporting a LOT of weight. Don’t tell anyone, but, I just guessed where the studs were, then drilled a couple holes until I found them. So wrong… but it worked! Those extra holes are cover by the pot rack, so it doesn’t matter too much. 😉 Mark the spots on the rack where your screws will go, predrill the holes, then mount it to the wall. Don’t forget your screw caps!
10. Measure & mark where your hooks need to go (depending on the size, shape and number of pots & pans you have), then screw ’em in!
11. Put away your cookware & rejoice! You now have cabinet space for your other kitchen junk.
12. Take a picture for facebook, of course. 😉


